The Step-by-Step Process of Cabinet Refinishing
The Step-by-Step Process of Cabinet Refinishing
What to Expect
Cabinet refinishing is one of the fastest, most cost-effective ways to give your kitchen a fresh new look without the expense and hassle of replacing cabinets. If you’re considering cabinet refinishing in Edmonton, understanding the process will help you make an informed decision and set the right expectations.
In this guide, we’ll walk you through the professional refinishing process, from preparation to final installation, and share expert tips to ensure a durable, high-quality finish.
Why Homeowners Choose Cabinet Refinishing
Refinishing cabinets is a popular choice among Edmonton homeowners because it offers:
✅ Significant cost savings over replacement (Save up to 75%)
✅ Minimal disruption (Get a new look in just a few days)
✅ Eco-friendly solution (Less waste compared to replacing cabinets)
✅ Fully customizable colors & finishes to match your kitchen’s style
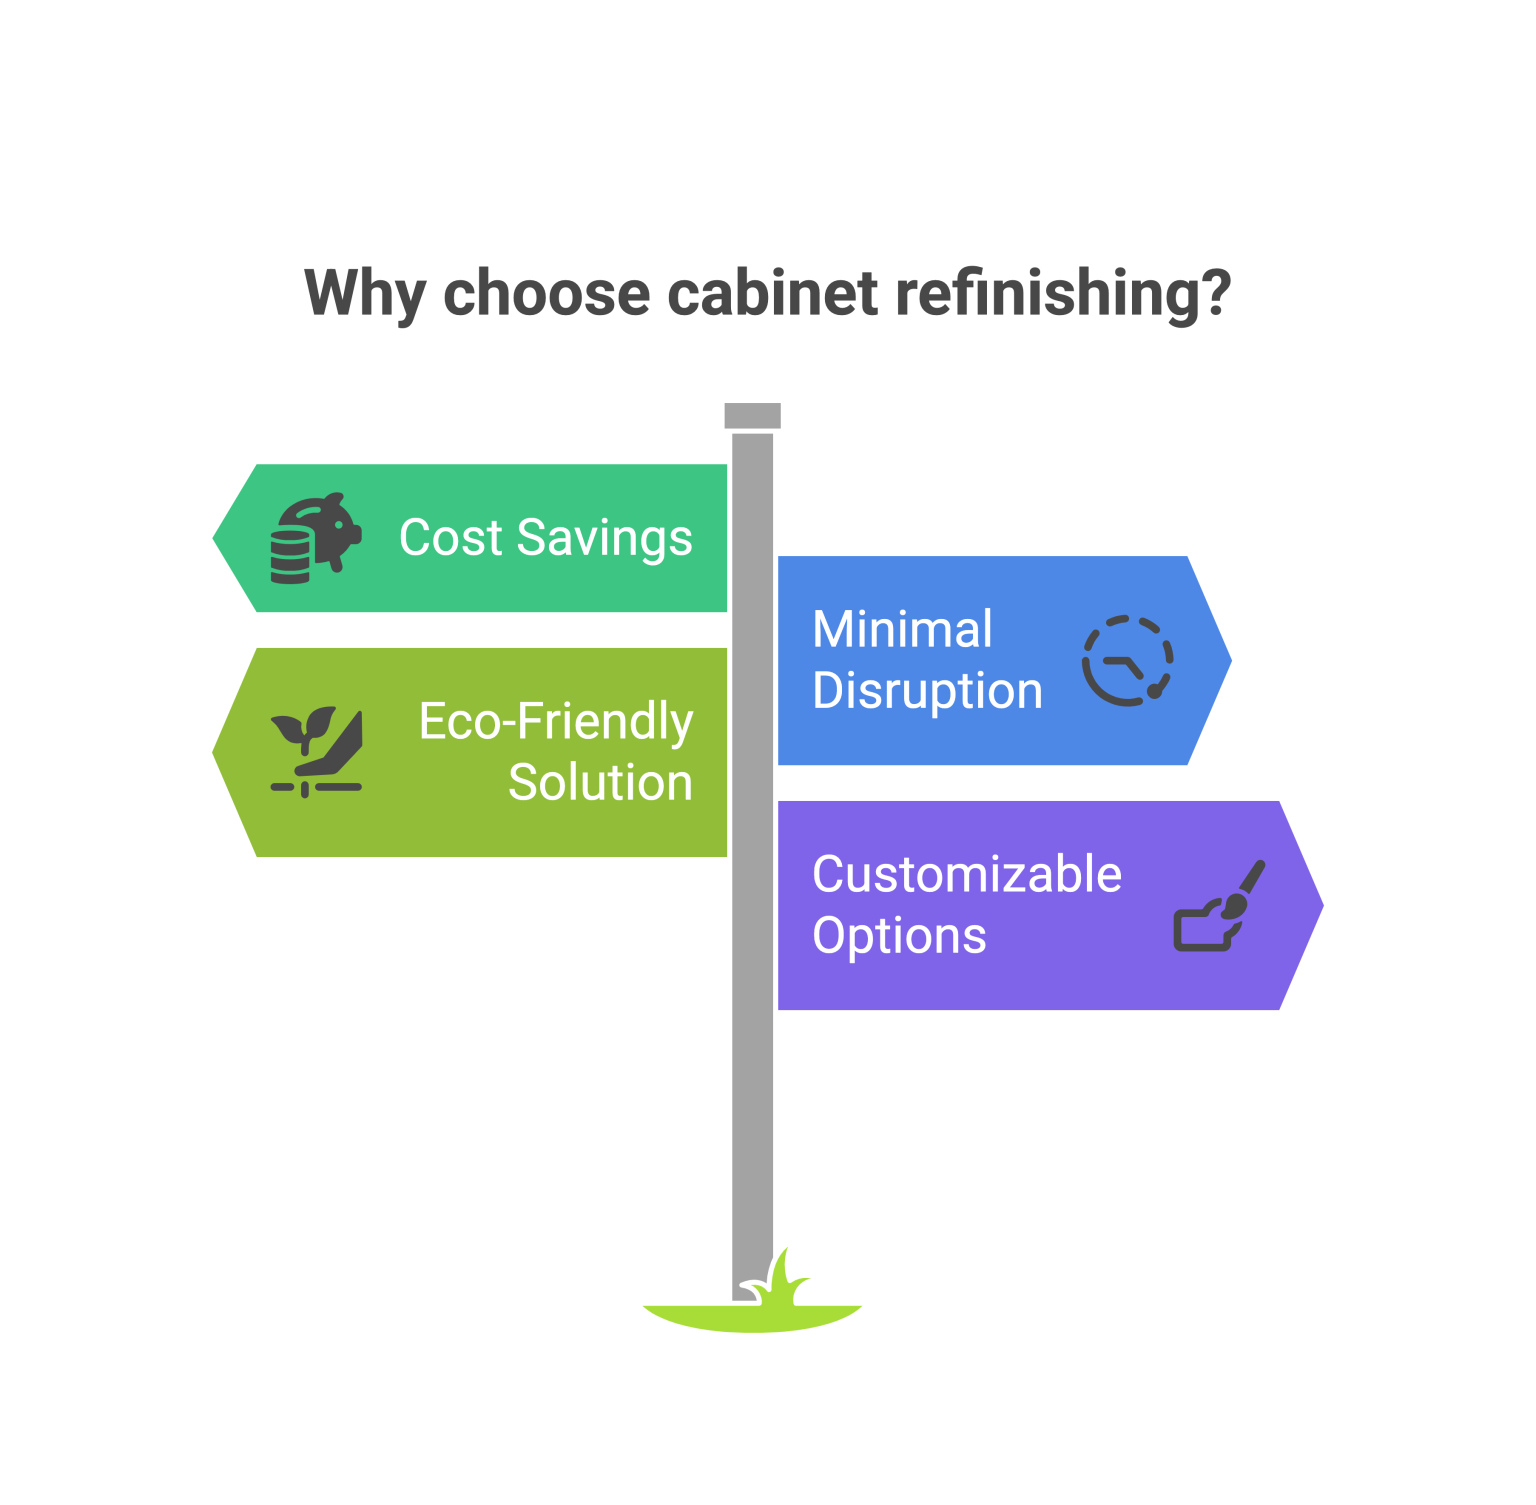
If your cabinets are structurally sound but look outdated, refinishing is the ideal solution to refresh your space without a complete remodel.
Step 1: Initial Consultation & Color Selection
The refinishing process starts with a free consultation, where we assess your cabinets and discuss your design goals. During this phase:
- A refinishing expert evaluates your cabinet material & condition
- You choose your new finish (paint, stain, or glaze) from a wide range of colors
- We provide a detailed cost estimate & project timeline
🔹 Pro Tip: Neutral shades like white, gray, and greige are timeless and help improve resale value!
Step 2: Preparing Your Kitchen & Cabinets
Preparation is crucial for achieving a smooth, long-lasting finish. Here’s what happens:
✔️ Cabinet doors, drawers, and hardware are removed
✔️ Surfaces are cleaned and degreased to remove built-up oils and dirt
✔️ Any minor repairs (filling cracks, fixing loose hinges) are completed
✔️ Protective coverings are placed over countertops and appliances to prevent dust & paint splatter
This step ensures a flawless refinishing process while keeping your kitchen clean and safe.
Step 3: Sanding & Surface Preparation
Proper surface preparation is key to paint adhesion and durability. We use a dust-free sanding system to:
- Remove old finishes, scratches, and imperfections
- Smooth out the cabinet surface for even paint absorption
- Ensure paint or stain bonds properly, preventing peeling or chipping later
🔹 Pro Tip: If cabinets have a glossy finish, light sanding or deglossing is necessary to help the new paint stick properly.
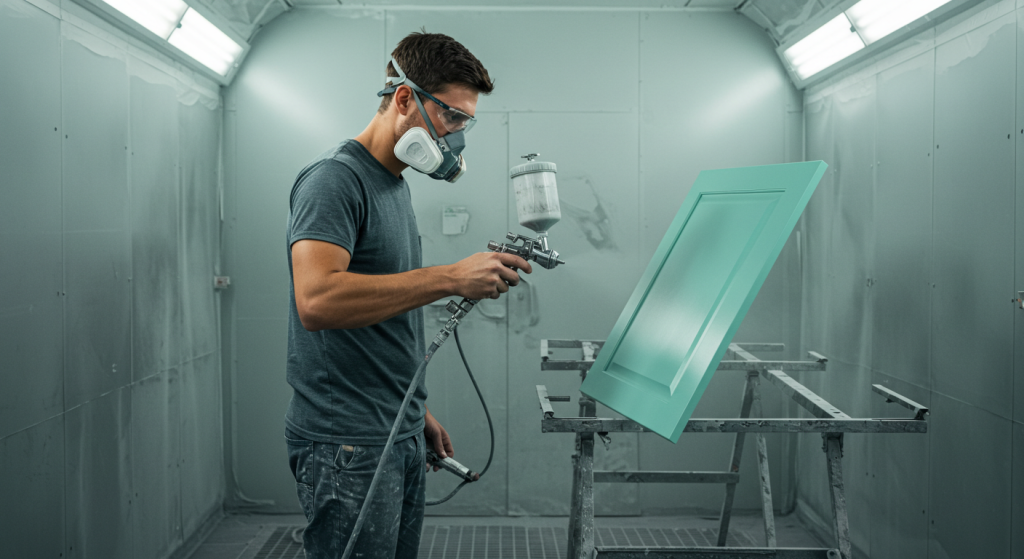
Step 4: Priming & Painting (or Staining)
After sanding, cabinets are primed and refinished using professional-grade coatings. Depending on your chosen finish:
🎨 Painting Process:
- A bonding primer is applied to ensure durability
- High-quality cabinet-grade paint is sprayed for a smooth, factory-like finish
- Multiple coats are applied to achieve full, even coverage
🌿 Staining Process:
- A custom wood stain is applied to enhance the natural grain
- Cabinets are sealed with a protective topcoat for durability
🔹 Pro Tip: For high-traffic kitchens, we recommend a satin or semi-gloss finish for easy cleaning and longevity.
Step 5: Sealing & Protecting Your Cabinets
To ensure long-lasting durability, we apply a protective topcoat or sealant, which:
✔️ Prevents scratches, stains, and moisture damage
✔️ Provides a smooth, professional finish
✔️ Ensures cabinets remain easy to clean & maintain
🔹 Pro Tip: Water-based polyurethane or lacquer coatings offer high durability without yellowing over time.
Step 6: Reinstalling Cabinet Doors & Hardware
Once the refinishing process is complete:
✔️ Cabinet doors & drawers are reinstalled with precision ✔️ New handles, knobs, or soft-close hinges can be added for an upgraded look ✔️ A final quality inspection is performed to ensure every detail is perfect
Your newly refinished cabinets are now ready to transform your kitchen!
How Long Does Cabinet Refinishing Take?
One of the biggest benefits of refinishing is its quick turnaround compared to replacing cabinets. On average:
🕒 Cabinet Refinishing Timeframe:
- Day 1-2: Preparation & Sanding
- Day 3-4: Priming & Painting/Staining
- Day 5-6: Sealing & Reinstallation
In just 5-7 days, you can enjoy a brand-new kitchen look without weeks of renovation.
Cabinet Refinishing vs. Painting: What’s the Difference?
Many homeowners ask, “Is refinishing the same as painting cabinets?” While similar, refinishing provides a higher-quality result because:
| Feature | DIY Painting | Professional Refinishing |
|---|---|---|
| Durability | May chip or peel over time | Factory-grade, long-lasting finish |
| Application | Often brush or roller | Sprayed for smooth, professional look |
| Surface Prep | Minimal (may skip sanding) | Sanded & primed for proper adhesion |
| Cost | $200 – $600 (DIY) | $2,000 – $6,000 (Pro) |
| Longevity | 1-3 years before touch-ups | 10+ years with proper care |
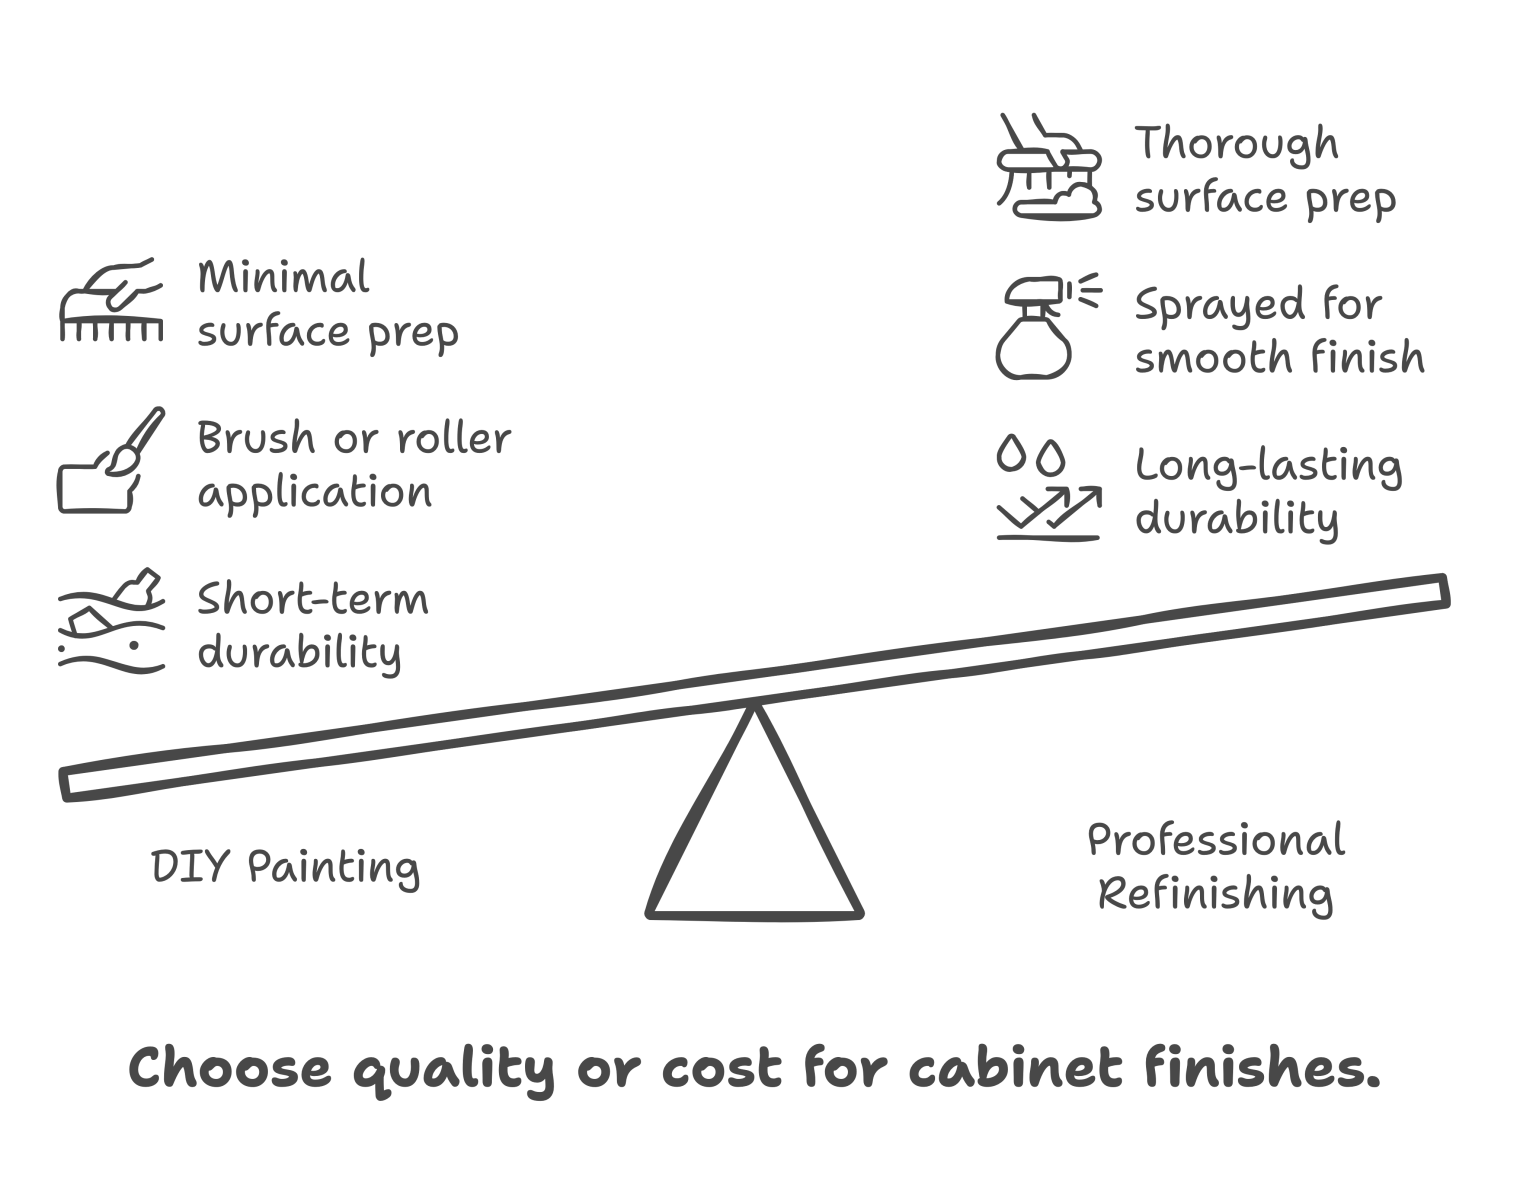
🔹 Bottom Line: If you want a high-quality, professional result that lasts, cabinet refinishing is the best choice.
Is Cabinet Refinishing Right for You?
Refinishing is a great choice if:
✔️ Your cabinets are in good structural condition
✔️ You want to save thousands compared to new cabinets
✔️ You need a quick kitchen upgrade with minimal disruption
✔️ You love your current kitchen layout but want a modern refresh
If you’re unsure whether refinishing is right for your home, our team at Cabinet Refinishing St. Albert can provide a free consultation and expert recommendations.
Get a Free Cabinet Refinishing Quote in Edmonton Today!
At Cabinet Refinishing St. Albert, we specialize in high-quality cabinet refinishing services that transform kitchens for a fraction of the cost of new cabinets.
📞 Call us for a FREE estimate today!
📍 Serving Edmonton, Sherwood Park, St. Albert & surrounding areas
💬 Request Your Free Quote Online Now!